Though my full vision couldn't be realized in this room due to size, I'm still really happy about what we accomplished here! After much tug-of-war, soul searching, bargaining, I have my own sewing area, and my husband has his own work space. My saddest concession was that there isn't a couch in here like we had in our previous office incarnation, but she just wouldn't fit. We've decided a bean bag chair would be a great compromise, and I love having the excuse to finally own one!
Here's how I organized all of my supplies:
First, I decided that one cabinet would be for sewing materials, and the other for all other crafting, cooking, junk I have. The "closet" center still hasn't been fully realized, but that's where I'll be keeping my wrapping paper and other larger items.
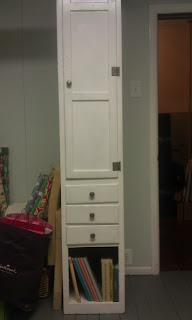
The sewing cabinet was the biggest challenge, since I was literally combining about 7 different storage devices into one. Even after a whole week being operational, I think hear some of Handel's "Messiah" every time I open a cabinet. I used the top, middle, and bottom sections for different items.
The top is for fabric and patterns:
First I organized my patterns into a pattern box my grandmother gave me. I haven't done anything fancy with them yet, but I anticipate needing to make dividers as my collection grows. At this point, I've gotten them just organized in groups without any clear delineation: outfit "sets", coats, shirts, dresses and skirts, pants, mens, homegoods, and accessories. The largest issue with this is that KwikSew patterns are an inch longer than all of my other pattern envelopes, so as I get more (and the box more crowded), I'll have to upgrade.
This box is on the bottom shelf with my sewing machine feet and manual, rulers/straight edge, and a current project.
Then I divided my fabric by type; based on what I have I created some categories: linings, interfacings, and cuffs, cotton and cotton blends, and finally everything else (mostly upholstery odds and ends).
The middle section of this cabinet is drawers. This was much more difficult to organize effectively, and will probably be revised as I use it more frequently. The top drawer has three compartments, so I used those for zippers; sewing machine needles, bobbins, and oil; and various sewing tools (seam ripper, shears, paper scissors, pins, etc.) The middle drawer is my notions drawer. I did my best to separate by type so the ribbons, bias tape, lace, cords, and elastic are wound up on a bit of board or spool; then buttons (mostly in a ziplock bag, feathers, and beads are loosely organized behind that. The bottom drawer is my "bra drawer" I figured that since the fabric, notions, and other materials are so specific in this case they warranted their own drawer.
Below the drawers is a cubby, perfect for my books, which are organized in no particular order since I have so few.
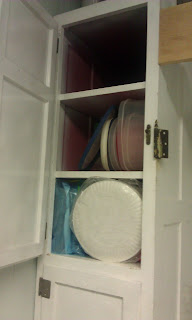
The left cabinet is quite difficult to get pictures of, but here goes:
The top cabinet is being used for various pans and serving platters, Tupperware, etc. that I can't fit into my kitchen. Not exciting, but useful.
I used the bottom cabinet for all of my knitting & crochet supplies. I used the top shelf for current projects (or lost causes as I've come to think of them), needles, hooks, and books; the middle two for yarn (loosely separated between acrylic and "nice" yarns). The bottom shelf is a costume shelf--Bob's ladybug Halloween costume and an inherited 70's jumpsuit from my grandmother, which I obviously used as a costume at some point in college.
I even fit into it with my 5 months belly!
Like I said, this is still a work in progress, so I'd love to hear feedback on better ways to organize.
Coming up next is the desk itself--I'm still setting my my machine and new serger on my side, and trying to organize the computer and filing side so it looks nice on my husband's side.


No comments:
Post a Comment