Monday, February 27, 2012

Getting the Garden Ready

I am so excited for Spring this year!  My poor garden really suffered from my pregnancy last year, and I can't wait to get my hands (and baby Mikey's) dirty this summer!

Right now, I'm planning what I'd like to grow and Mark is plotting a compost pile.  Thankfully, we have a wasteless friend without a garden, who set up and has been maintaining a worm compost system in her basement since the fall to help rejuvenate our tired soil.  It's a pretty amazing contraption which I'd like to learn more about and post on in the future...

I generally order my staple plants and seeds from Burpee and then supplement with a few "test" plants I'll find at a farmer's market, the Depot (Home, that is) if they actually have something that looks worthy, or the New Jersey Master Gardener's Plant Sale at Rutgers in May. 

My staple plants are the veggies that we eat all the time:
-Raspberries.  I got a stem from the Depot about 10 years ago and then two more from my in-laws (apparently a family heirloom) about 5 years ago that fruit on different schedules (not planned) and seem to do really well in our yard.  We eat them fresh, frozen, and I make jelly out of them, too.
-Tomatoes.  I order the plants from Burpee--I haven't had much success with the seeds for some reason.  I really like their heirloom mix package which has some really great varieties and is just our size (4 plants).  I've grown the heirloom mix at least 4 times and they do really well every year--even two years ago I had a HUGE haul when the rest of the eastern seaboard wasn't getting any tomatoes!  I definitely can my tomatoes, which I showed you how to do in this post (LINK).
-Cucumbers.  I grow the cucumbers from seed--it's just as easy.  This year I'm trying a bush variety, as the vines haven't really done so well for us, and Burpee says they're a great container option.  When I get a good cucumber crop, I make refridgerator pickles from my grandmother's recipe in addition to eating them fresh.
-Herbs.  There are rosemary and sage "bushes" that come up every year for us, and then I plant basil and cilantro.  I usually plant both from seed (start them indoors and then transfer outside), but last year I just bought the plants since I wasn't feeling well (and hadn't figured out why yet).  I actually plant so much basil that my husband has dubbed a section of the garden "Basil City".  I make basil pesto continually through out the summer and fall (learn how in this post LINK), and if I have any spare cilantro that I won't have time to use fresh I'll make a puree out of it and a tiny bit of oil and freeze it or refridgerate it until I can use it.  It's great.
-Peppers.  I usually get two bell pepper plants and two hot pepper plants--one chili for drying and one jalapeno.  Hot peppers do especially well in our garden for some reason...
-Eggplant.  2-3 plants depending on the variety.  I go for purple bulbous varieties.  Not into the white ones or the skinny asian varieties for some reason.
-Lettuce.  I get seeds, and usually go with Burpee's heat wave blend.  Our garden gets a lot of sun, and I like lettuce in the summer (typically lettuce likes it a bit cooler so spring and fall are high-lettuce periods) so the heat wave blend works well for us.  To save space, I plant it between the tomatoes--it helps to shield the lettuce in the summer from the sun, and allows them to get all the sun they need in the spring while the sun isn't as strong yet.  As I harvest my lettuces, I'll plant more so that we have a continuous harvest.
-Squash.  I have both started from seed and plant--just depended on my mood and what was available.  Because our garden is relatively small, I can only do one squash plant per year so I rotate.  Last year we had zucchini, so this year I'll probably do butternut or some other winter squash, and next year I'll probably do pumpkin.

My test plants are fun things I'd like to try.  Sometimes I plan it and sometimes I'll just come across something randomly.  Here are some things I've done in the past, and some I'd like to do in the future:
- Thai Basil
- Bush beans of some type
- Melons
- Pumpkins
- Lemon Basil
- Leeks
- Kohlrabi
- Spinach

I'll be starting the seeds soon, and I'll try to get some good photos for a tutorial. 

Thursday, February 16, 2012

Parent Cave: Desk Organization

Wow!  With the arrival of the holidays and my "tchotchsky" as my mother calls him, I've been woefully remiss in posting.  Thankfully, I've got this post that I had started before Thanksgiving which only needed a bit of editing and some photos before it was ready to put up.  Enjoy!

---
Phew!  I thought this would be easier than my sewing stuff, but alas, life doesn't work that way.

After the relatively easy task of setting up the computer and sewing apparatuses themselves, some odd conundrums presented themselves:

First to tackle the trash: Please husband, remove!  I can't lift too much stuff anymore as my abdominal muscles are actually separating down the middle!

Then lamp selection and finding them light bulbs.  This was actually difficult because the lamp with the best light for sewing (and the only readily available bulb) was also the lamp with the writing utensil sorting bins.  Husband side won that one, and after a few projects were completed, I realized that with the natural light coming in from the window, the lamp was a very minor concern anyway.

After that, I had to make some decisions on leg space.  Originally, one of the two file cabinets on casters was to go under the Kim-section of the desk.  After some thought, I realized that I need to be able to move back and forth kind of easily under my desk during some sewing projects, and sometimes even to the computer (for uploading photos and blogging of course) and my knees were going to be rainbow colored within a week if I left it there.  It also had the potential to block some of the heat from the radiator if we left it under there, which is never a good thing.  So I sacrificed some ease of getting into my yarn cabinet to save my lower extremities.
Shelves will be going up on the walls above the husband's side with his books--big heavy engineering books--and our joint reading library.  We're quite lucky in that we both like similar types of pleasure reading books and many of the same authors, so when we actually buy a book it gets read at least twice.

For now we're sharing a chair, but a new chair for Kim is definitely on the horizon.  My husband's chair (apart from being 10 years old and a remnant from a frat house) is a bit too big for sewing making it difficult to move around, and its arms make it hard to wrangle some fabrics.  It's also not the easiest to move up and down (or even around on the rug we bought), and I like an especially high chair while sewing; the husband prefers a low chair to type and review documents.

We will also be buying/making another chair--a bean bag chair!  I'm very excited about this, as I was never also to have one as a child, and I LOVE them.  I also anticipate this being a great place to be able to put the baby when it's sleeping and I'm hanging out in here.  Currently researching...

Monday, November 14, 2011

Food: Basil Pesto

 My last harvest before that crazy mid-October snow storm!

Making basil pesto is one of the easiest things to do in the kitchen, and frankly one of the most versatile ingredients you can have on hand.  We use pesto not only to make pasta, but also to make bread, salad dressings, marinades, and all sorts of sauces. 

To store, you can either "oil cure" it  as I've shown below (lasts about 2 months in the fridge) or you can freeze it.  Our stash never lasts longer than 6 months, but that's because we eat it all the time!

What you'll need:
-A food processor.  You can probably use a blender, too, but this gal here is my favorite wedding present, and I use her often.
- Basil of course.  Don't use the stems--especially the big ones.  Pick off the leaves, wash and dry them before using. I make as big a batch as I can manage.  It's just as much work to make a huge batch as it is to make a little one.
-Olive oil.
-Salt
-Pepper
-Nuts.  For tradition's sake, use pine nuts.  If you're broke or run out, I like walnuts.  My grandmother uses peanuts...
How you'll do it:
-Put as much basil as you can muster into the food processor. Add a bit of olive oil (maybe a 1/4 cup to start), salt and pepper.
-Whir that until it breaks down and then cram some more basil in. Add more oil.  You may need to add a bit of oil as you whir it, too, to get things going.  You'll just have to eyeball it.
-Once you get all of your basil chopped up to an almost paste (aka pesto), add the nuts.  I usually do a 1/2 a full cup of nuts depending on what kind of nuts (I use less pine nuts than walnuts).  Pulse once or twice to chop them up, but be careful not to make them completely disappear.  You want little bits of crunchy in there.
-Salt and pepper to taste.
 
 How to store it:
-I use canning jars or old jelly jars.  It seems to be the easiest way for us.
-Once I fill the jars up to about an inch from the brim, I clean the rim, and then top it off with oil before sealing up.
-To keep the pesto green in the jar after using some, make sure that there is always a layer of oil on top of the pesto.  This keeps the air out and prevents the oxidation that will turn your pesto brownish.
As mentioned above, I keep them both in the fridge and freezer.  There is always one jar of pesto in my fridge ready to go, and the rest hang out in the deep freeze until I need them.  To defrost in a hurry, I'll either run the jar under hot water or remove the metal top and put it in the microwave for a minute.

Enjoy!

Friday, November 11, 2011

Food: Peanut Butter Stir Fry

Wow!  I can't believe how long it's been since I posted.  I also can't believe I let this post sit half finished for a month!

Some of my favorite things in the world are Thai food, peanut butter, and using up things that are about to go bad in my fridge.  This recipe really helps satisfy all of them.  Please modify your recipe to include whatever kind of meat (or tofu) and veggies you have--that's the best part of this dish!
 
The ingredients: 
These guys you really need
Garlic (1-2 cloves)
Onion (1 med/large)
Bell Peppers (1-2 red, green,whatever)
1 hot pepper (jalapeno, chilis) with or without seeds depending on your heat preference
Peanut butter (1 cup or so)
Chicken or vegetable stock/broth (1-2 cups)
Coconut MILK (4 oz.)
Lemon or lime juice to taste (fresh works best and looks prettiest)
Protein (1/4 -1/2 lb. chicken, steak, pork, tofu)
Curry powder (TBS or so)
Ground ginger (1 tsp or so)
Hot sauce to taste (I like Srirachi sauce)
These guys are whatever you have in your kitchen
Mushrooms*
Green onions*
Broccoli*
Cilantro (to garnish)
Cauliflower
Carrots
Celery
etc.
The steps:

Chop all of your veggies into bite size pieces, with the exception of the garlic and hot pepper which should be diced pretty finely.  Remember to remove the seeds of the hot pepper if you don't like things as spicy.
Put everybody in a good size pan with a bit of oil and a sprinkling of salt.  I've used peanut, olive, canola, and sesame for this and it all kind of comes out the same taste-wise, so use whatever you like.  I like to ride the line between a sweat and a sautee on this.
Cook veggies to mostly soft (I like mushier veggies) and then transfer to a bowl to set aside.
Get out your protein (I used chicken this time, but I usually do tofu or a mix), and cut it into bit size pieces.  Before adding it to your pan, you may want to add a little more oil.  Toss in the curry powder and ginger with the chicken and a bit of salt and black pepper to taste.

Cook the chicken until brown and just barely cooked, and then remove from pan and set aside.

Now we make the sauce!
Add your peanut butter and coconut milk to the pan, and stir over med-low heat until mostly combined.  This could take a minute, so be patient.  If you'd like to add more curry or ginger, now's the time.

Once combined, it will thicken pretty quickly over the heat, so start adding in the stock until you get your desired consistency.  I usually thin it out until it's back to the consistency of the coconut milk, as I find it coats things well that way.

Add your chicken, and heat for a minute.
Then add your veggies.


I serve this over rice (usually the sticky white kind), then garnish with lime wedges (or just some juice), chopped cilantro, and green onions, and put out a bottle of srirachi (hot sauce) for folks to add as they please.

This also freezes really well with or without the rice.; I divide it up into invidual servings in tupperware and freeze for up to 3 months.  Heat in the microwave a few minutes and enjoy!

Tuesday, October 4, 2011

Food: Butternut Squash Lasagna

After making a traditional lasagna last week, I still had a half tub of ricotta (and a half pan of lasagna) in my fridge.  I dove into my brain and came up with this recipe, which I'm planning to use as a side dish for the months to come.  After baking and cooling, I cut it up into portions and put it in the deep freeze.

If I remake this, I definitely have some tweeks to add, but I think as a first attempt I did pretty well. 
*Please note that I don't measure when I cook so all measurements are approximate.*

Ingredients
1 box of lasagna noodles
1 small butternut squash (approx. 1 lb.)
1 large yellow onion
2 cloves of garlic (med-large)
rubbed sage
1/4-1/2 cup unseasoned bread crumbs
1 1/2 lbs of ricotta cheese (I used part skim)
1 egg
olive oil

First, peel the butternut squash, cut off the stem end, cut in half long ways, and scoop out the innards.  Slice the squash into half-moons about 1/8 inch thick.  I used the slicer on my food processor, but you can also use a knife to slice if you have the patience.  Set that aside
 Then, dice up your onion and garlic, and put into a hot pan with some olive oil to saute/sweat for a few minutes.

I have an unconventional method to prepping my noodles.  I lay the noodles in a pan (this one is a little small for these noodles) and pour boiling water over the top.  It makes it easier to grab the noodles when you start layering, and you have a better view of the noodles you're working with (broken vs. whole).  After I pour the water on, I let them sit for 5-10 minutes to soften up and cool off a little bit.  Don't let them sit so long that they get mushy...then they get slippery and much harder to work with.
*Don't toss the water when they've softened.  You'll find out why in a bit.*

On to the filling:
I used about half of a 3 lb. container of part-skim ricotta cheese (roughly 1 1/2 lbs.), and added one egg and about a 1/2 cup of bread crumbs.  Depending on how wet your cheese is, you might need to add more or less.  I broke up the egg and stirred this mixture a bit before I add the onions and garlic, a pinch of salt, and close to 2 TBS of rubbed sage.  If you have crushed sage, that would work, too.


Mix well, and adjust seasoning and bread crumbs as necessary.  It shouldn't be a runny mixture, but like a loose paste so that it spreads easily.

Now to construct!
I used a deep casserole dish (8x8 I believe), but you can use a long pan, too provided you don't cook for quite as long.  I got 4 layers in this batch.

Step 1: line the bottom of the pan with the least broken pieces of noodles you have.  You may need to cut parts off to make them fit and that's okay.  The most important part is to have the most solid even bottom to this as possible.
Step 2: Spoon out a heaping spoonful onto each noodle and spread it out.  If you think you need a bit more, throw another spoonful in there.

Step 3: Layer out the squash over top.  This layer is a bit light on squash, and my future layers were much more orange.

Step 4: Take a ladle of water from your noodle's bath and pour it around the edges of this layer.  This will give your noodles more moisture to suck up as they cook, and also help steam the squash until it is tender.  If your squash looks a little dry, it wouldn't hurt to go with two ladles.

Repeat Step 1-3 until you get to the top of your pan or you run out of materials.

If I had it, I would have sprinkled some Peccorino cheese over the top of the last layer of squash and maybe even a bit of sage for color and make it look prettier.

Bake covered in a 350 degree oven for about 90 minutes.  If you use a flatter pan, start checking it at an hour for doneness.  The squash should be tender.  Let stand at least 20 minutes before serving.

*Note:  I forgot about this in the oven and cooked it almost two hours, and it still looks good!  It was a little dry, but still really great.

Tuesday, September 20, 2011

Canning: Tomatoes in their own juice

I was so happy to come home last night and find that my tomatoes had started to ripen!  This year has been a particularly bad season for tomatoes (really hot so that the flowers wouldn't fruit and then super cold so they won't grow and ripen in addition to fighting the birds for them), and before last night I'd only gotten maybe 5 tomatoes off of my 4 vines so far this year!  Here's last night's haul:

Don't adjust your screen--they are yellow with a few pink (Brandywine I think) and purple guys (Black Kirin?) in there, too.  Yellow tomatoes tend to be sweeter than red or pink tomatoes, and carry a higher sugar content and usually a lower water content. Purple tomatoes tend to be the most tart tomatoes.

Since I knew we'd never be able to eat all of these before they started rotting, and I just killed the last jar of last year's tomatoes when I made a chili two weeks ago, I knew these needed to be canned.  I use Ball's Blue Book of Preserving as my guide for all canning matters.

If you're interested at all in canning or freezing or dehydrating or even just some fun chutney recipes, I highly recommend getting acopy of Ball's Blue Book.  I think I paid $7 for mine a few years back, and refer to it constantly when I have a surplus of fruit or veggies.  I took a picture of my copy since it's relatively new; I would imagine the edition hasn't been updated yet...

The tools:
For this many tomatoes, I'm only going to get 4-5 jars going, so I don't bother using my huge canning pot.  I use a large sauce pot for skinning the tomatoes and a 5 qt stock pot for the sterilizing and processing of the tomatoes.  I fill them with water and set them on the stove (with lids of course) to boil before I tend to the tomatoes.

I also assemble my jars (5 in this case, but I only used 4 ultimately), new lids, rings, jar tongs (not sure what the real name is), canning funnel (not shown below), measuring/air removal tool, lid retrieving magnet, stainless tongs, and measuring spoons.

You'll also need an ice bath (I used a large bowl) and colander set up.  You can also do this in your sink if you like, but I like the be able to have the ice bath mobile.

It's also a good idea to get out the bottle of lemon juice and kosher salt at this time if you have the counter space.

So the first thing I do is is wash the tomatoes, take off the green stem if it's still there, and then mark an x in the bottom.  This really helps with skin removal.

Once the smaller pot is boiling, place a few (3 or 4) tomatoes in there.  This won't take but a half minutes tops to get the skins to start waving in the water.  Once the skin starts to separate, move the tomato to the ice bath you set up.  You don't want to wait, or you'll start to cook the tomato; you'll lose some of the flavor to the water and the mushiness will make the peeling difficult.

I made a video of how quickly this part goes, just in case you don't believe me


Once the tomatoes have cooled enough for you to handle them, start peeling.  Don't forget to take out the core, any blemishes, and as many seeds as you can muster.  I just put 4 or so slits down the side of the tomato and scoop of the seeds with my fingers.  The cleaned tomatoes look something like this:
Now, that you've cleaned and skinned all of your tomatoes, I bet the water in your processing pot is boiling.  Now's the time to sanitize your jars, lids, measuring tool, canning funnel, and stainless tongs.  I always put the jars in first as they take the longest and you'll need them first.  You can put the tongs in so that just the ends (that which touches the tomatoes) is in.  Leave them to process for at least 1 minute, and retrieve with the jar tongs.
I usually put the jars on a towel to cool for a minute (don't touch the lip or inside of the jars!) and then start preparing them for the tomatoes.  Don't sanitize the lids for too long, or the adhesive ring can melt and be ineffective.  These should be retrieved with the lid magnet, and left to dry face up on a towel or counter.

First, add at least 1 Tbs of lemon juice to each pint jar (use 2Tbs for a quart size jar), and a dash of kosher salt.  For these tomatoes, I used 2 Tbs per pint jar because they're sweeter tomatoes than most, and the acid must be high enough to ensure good preserving.  Also, use bottled lemon juice for this step and not fresh--bottle lemon juice has a constant level of acid (they make it that way on purpose) while a real lemon's PH level varies widely depending on variety, age, time of year, etc.
Now we start to add our tomatoes!
Put the funnel in the jar and stuff the tomatoes in the jar until you have about an inch (usually about where the screw top rings start on the jar).  Use the measuring tool's flat side (or a sanitized spoon or butter knife) to work any air bubbles out around the side of the jars.  Usually after I do this, I have to add at least a half tomato more to get to an 1/2 inch of head space (the measure between the lip and the top of the tomatoes) needed for effective processing.
Each one of those little stairs is a 1/4 inch!  It's really a great tool to have if you plan to start canning a lot.

If I need a bit more tomato to meet my head space requirement, I use the juice left from the tomatoes in my cleaned tomato bowl. Sometimes there's not enough, and then I'll grab a Tbs or so from the boiling processing pot.

Now we start to put the lids and rings on.  Make sure the lip of the jar is clean before you put the lid on by dabbing a towel in the boiling water and wiping the lip only, being careful not to touch the inside of the jar.  Place the lid on top (shiny side up), and then tighten the ring so that it just closes.  You don't want to tighten it too tight or air can't escape from the jar while boiling and will interfere with the vacuum needed for a good seal.

Put the jars in BOILING water.  Once all the jars are in, make sure you have about one inch of water above the tops of the jars.  I keep a hot kettle ready sometimes to help top it off and keep the water temp pretty close to boiling.  Bring the water back to a strong rolling boil and start your timers for 40 minutes (for pint jars like mine).
Be very careful when putting the jars in.  I don't want anyone getting burned.

After forty minutes, use your jars tongs to retrieve the jars, and set them on a towel or trivet or something that won't melt to cool.  They will need a few hours to cool down completely, but you might start to hear the lids popping after only a few minutes!  It's pretty fun even after a few years to hear them pop.  You may also hear a weird sucking noise as they begin to cool--and that's a good thing!  That means your vacuum is working.

One thing to look out for before putting the jars of tomatoes into storage:
*The lid didn't suck down all the way.  If you can press down on the lid and it pops back up, you'll have to reprocess the jar. (Use a new lid, wipe the lip down again, and boil again).

Two things to look out for before using the jars:
1. The lid pops back up. (I don't recommend reprocessing if the jar has sat for longer than a day.)
2. Any weird colors that pop up.  Black, purple, brown, green are not supposed to be there.  That means you got some bacteria or yeast in there.
Toss these jars immediately.  The $1 or $2 you save by using them is not enough to warrant a night over the toilet or poisoning your family.  Some icky things can live in improperly processed jars...

I've stored tomatoes for a full year with no problems and made some great dishes with them, too.  Store them in a dark, cool , dry place--your pantry!

Time requirements:
For newbies, set aside a few hours to get this all done for sure.  You might want to give yourself at least 4 hours.
I got this all done after I got home from work at 6pm, went into my garden for the tomatoes, canned them, cleaned up from it, and made dinner all the same time, all before 9pm.

Monday, September 19, 2011

Sunday Morning Breakfast (but on Saturday): Banana Pancakes

Usually on Sunday mornings, the hubby and I go out to our favorite diner (Bob's in Roxboro) and get breakfast.  I get pancakes and he gets some sort of egg dish (depending on his mood) in addition to some great company from the staff and other customers. Since this weekend I would be visiting a friend in North Jersey and unable to make our normal Sunday sojourn, we decided to make Saturday our day for our big breakfast. 

Of course we woke up too late on Saturday morning to make it to the diner and get my husband to his class on time, so we decided to make breakfast ourselves. I made one of my favorites: Banana pancakes.

I'm a freak when it comes to pancakes, and have to use a pancake batter I make from scratch--it truly produces a MUCH better pancake at a fraction of the cost of buying a mix and is just as easy to make as from a store bought mix.  The recipe I use is adapted from the Better Homes & Gardens Cookbook, and I've modified a few things that I've found work better:

1 cup flour
2 teaspoons baking powder
1/4 teaspoon salt
1 teaspoon sugar
1 egg (beaten)
3/4-1 cup milk (I start with 3/4 and add up to 1 whole cup depending on how the batter is turning out)
1/4 cup vegetable oil
1/2 banana
*If you'd like to use buttermilk instead of milk, use 1 tsp baking powder and 1/2 tsp baking soda

The equipment:
A frying pan or griddle
Measuring spoons
Dry measuring cup (for measuring and scooping)
Liquid measuring cup
Whisk
Medium bowl
Spatula (not a rubber one)


First the dry ingredients:
I dump them all into a bowl (flour, baking powder, salt, and sugar) and whisk them together quickly before adding the wet.  This helps you not have to mix as much once you add the dry and avoid tough pancakes.

Then add your wet.  PLEASE MAKE SURE YOU BEAT THE EGG FIRST!  Again, this shortens the amount of mixing and helps you avoid the tough pancakes--a kiss of death in my eyes.

Only mix enough so that the ingredients make a batter.  There will be lumps, and should looks something like this:

*A smooth batter is an over-beaten batter and you will end up with less fluffy and possible puck like pancakes if you mix until smooth.*

I'm a big fan of butter for all things, and I do cook pancakes with a bit of butter.  Heat your pan or griddle first before adding the butter over medium heat.  If you add the butter and it burns, you just saved a pancake from death because you know the pan is too hot.  Mine just melts enough to swirl it around the entire pan before it starts to bubble like crazy.


Add scoops of the pancake batter using your previously used dry measure cup.  I usually go for 1/2-3/4 full as I like big pancakes, but you can do whatever size pleases you.  After a 1/2 cup of batter goes in, I slice the banana directly into the pancake and then drizzle a bit of batter over the top to seal it all in.


I find that adding fruit to the batter bowl is a bad idea: they tend to lump together and berries turn the batter purple or pink (depending on what you're using).

Then DO NOT TOUCH THEM.  Just let them be for a few minutes.  I promise they'll be okay.  You don't need to poke them, check them, etc. 

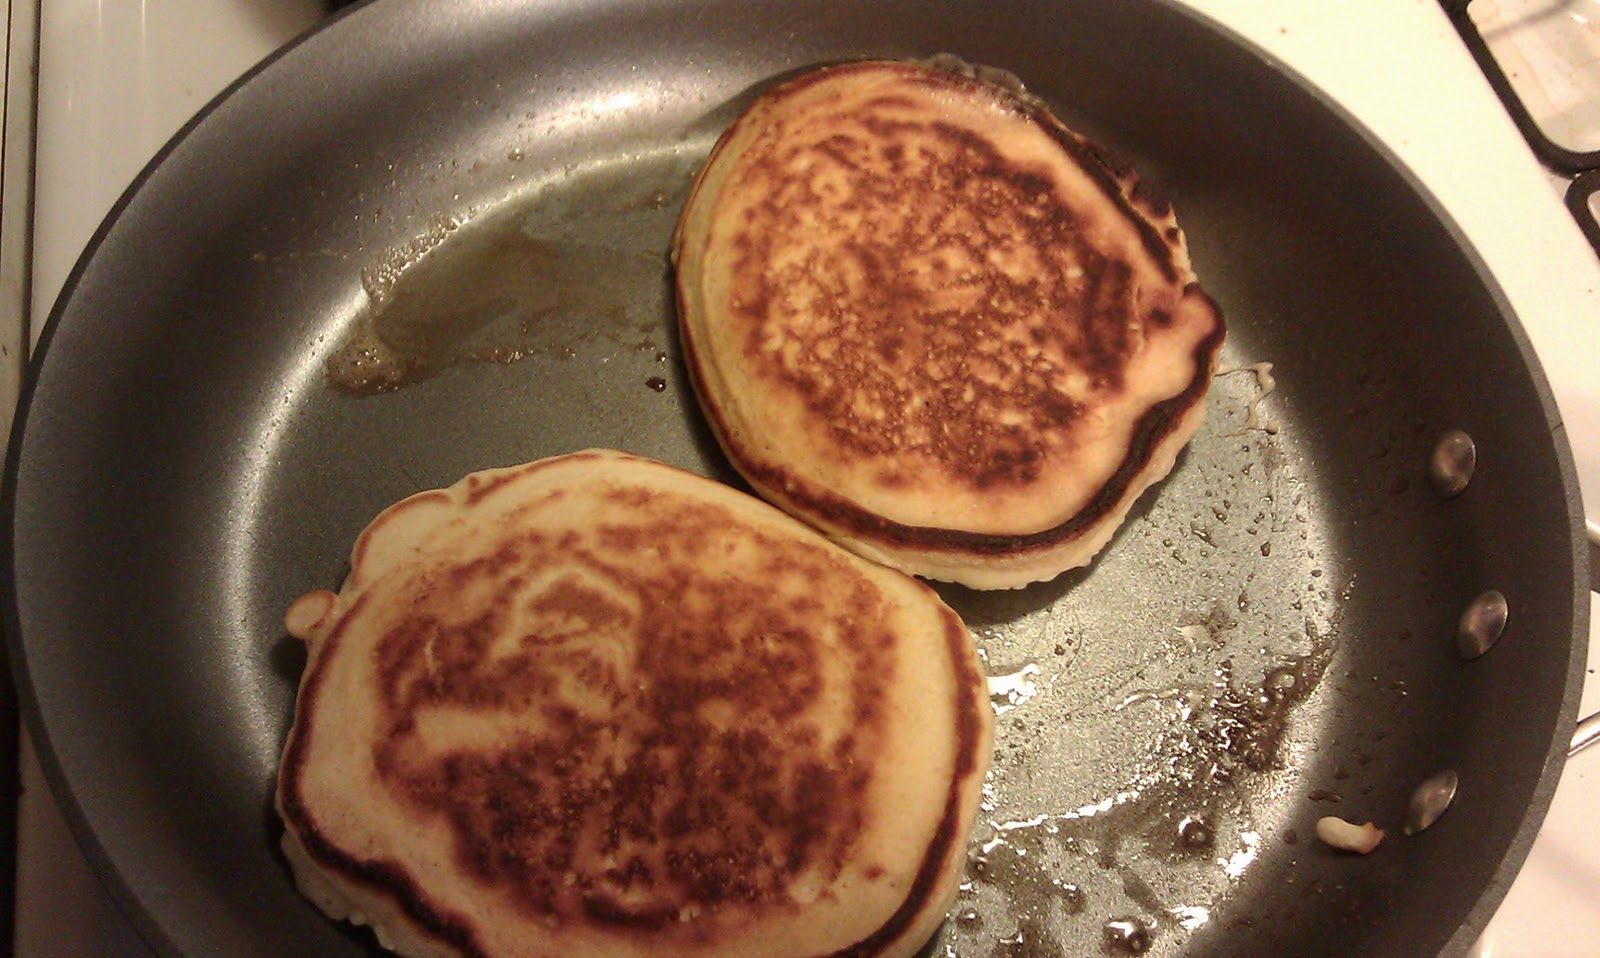
Once they start to dry around the edges and you get a good smattering of bubbles coming through, then you can check the bottom.  I like mine a bit more than golden brown, which ensures that my big pancakes are cooked in the middle, too.
Once you decide to flip, DON'T TOUCH THEM!  Leave them be for a few minutes, and please don't smush them down.  This is my pet peeve.  You're not helping them cook faster--you're popping all the bubbles inside that you just made and taking the fluffy goodness out.  After two minutes, check the bottom and if it matches the top, plate it.

Repeat the cooking process (you might not need more butter) until all of your batter is done.  With this batch, I got 5 huge pancakes out it, enough for at least 3 adults.

Now here's my secret--I make a warm syrup and butter concoction to pour over the pancakes in my pan.  I loathe cold syrup on my pancakes. 
*Please note that I don't know if this will work well with Aunt Jemima or other "maple-flavored toppings".  I only use the real stuff.  AJ might burn into your pan, since it's a different kind of sugar and ruin it.  Best to stick with real maple syrup anyway (in my opinion).*

Using your empty pan and its residual heat (burner off):

1. Add a bit of butter.  Like I said earlier, I love butter so I usually add in 1 Tbs per person.  To go with the above pancake recipe, I use just shy of a half stick of butter. Use more or less depending on what you like your syrup to butter ratio to be.

2. Let the butter melt for a bit, and then add in the syrup.  I usually add in less than 1/4 per person It may or may not bubble up in the butter (depends on how hot your pan is, really.)

3. Swirl your concoction around the pan until the butter is all melted.  You might have to turn the burner back on depending on how well your pan retains heat, but I rarely have to.

4. Dump into a gravy boat (if serving at the table), or directly onto your plate and enjoy!